Newsletters: Mailgun
![]()
Using Mailgun with the WordPress Newsletter plugin.
1. What is Mailgun?
Mailgun is an SMTP email relay service which allows you to send transactional emails through their API or via SMTP.
Included is tracking, bouncing, receiving of incoming emails and many other features.
From our experience, it is very fast and reliable. It is one of several SMTP relay services we can recommend.
2. Setup Mailgun with Newsletter plugin
2.1. Add and Verify Domain
Let’s assume that you haven’t yet added and verified a domain in Mailgun to use for sending. If you have, of course you can skip this step.
Go to your Mailgun dashboard and click on Domains in the top menu.
Then click the “Add New Domain” button to add your domain. The domain you’ll be adding is your own domain that you’ll be sending from (the “From Address” setting in the Newsletter plugin) and also most likely the same domain that your WordPress installation is running.
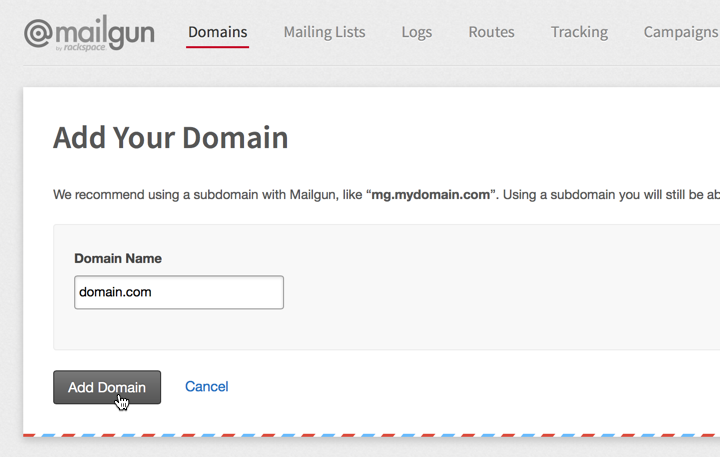
So add your domain eg. domain.com and click “Add Domain” to finish.
Next you’ll see a page which gives you several steps/instructions to follow. These steps will ask you to add several DNS records on your domain or hosting in order to verify the domain, apply DKIM (Domain Keys Identified Mail) and then also to do tracking of links in emails on your own domain name.
Follow the instructions but skip step 4 unless you actually want to use Mailgun to receive emails. In most cases you’ll want to skip this because you only want to use Mailgun for sending emails, not receiving emails.
You’ll see that Mailgun says “Unverified” and gives the following message:
If you’ve added the DNS records correctly, scroll down a bit and click the “Check DNS Records Now” button.

That’s it, you’re done and your domain should now be verified.
2.2. Get SMTP Credentials
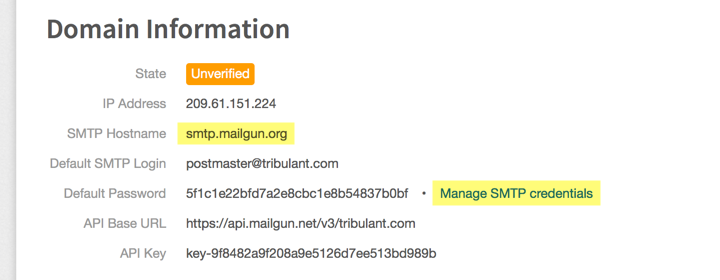
On the same page as above (the domain overview page), you’ll see “Domain Information“.
You’ll see an “SMTP Hostname” which is the SMTP host that you’ll use later on and then click on the “Manage SMTP Credentials” link where you’ll be able to manage your SMTP users, each with a username/email and password.
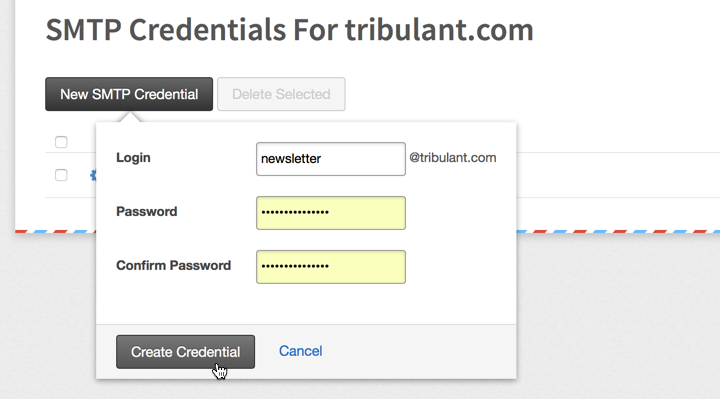
There should be a default postmaster@… SMTP user created but you can click “New SMTP Credential” to create a new SMTP user.
Make a note of the SMTP host, username and password since you’ll need it in the next step.
2.3. Configure SMTP Credentials in the Plugin

In your WordPress dashboard, go to Newsletters > Configuration > General > General Mail Settings and set the “Mail Type” setting to “SMTP Server“.
2.3.1. SMTP Host Name
The “SMTP Hostname” which was shown in your Mailgun dashboard earlier on.
This should be: smtp.mailgun.org
2.3.2 & 2.3.2. SMTP Port & Protocol
Mailgun doesn’t require a specific port/protocol. Read their article on which SMTP port to use.
We tested multiple port/protocol combinations and they all worked great so you can use any of the following:
- Port 25 with None protocol
- Port 587 with TLS protocol
- Port 465 with SSL protocol
- etc…
Some hosting providers have certain ports and protocols blocked for security reasons so your best bet is to use port 25 with None (over HTTP).
2.3.4. SMTP Authentication
Turn this on to specify your Mailgun username/password.
2.3.5 & 2.3.6. SMTP Username & Password
Here you will fill in the username (email address) and password which you created earlier on in Mailgun under “Manage SMTP Credentials” link.
Beautiful Newsletter Templates
Professional newsletter templates that are fully responsive for desktop, tablet, and mobile. They are 100% cross-client compatible.