Checkout: Authorize.net (AIM)
![]()
The WordPress Shopping Cart plugin together with the Authorize.net Advanced Integration Method (AIM) will allow you to accept credit card payments through your WordPress website using Authorize.net without sending your customers away from your site and keeping them inside your WordPress shop/store at all times.
Authorize.net (AIM) payment method requires an SSL certificate installed and configured on your site because billing data such as credit card details is sent directly from your WordPress site through to Authorize.net where it gets processed and a result is returned to your customer on the same page without redirecting.
Configure Authorize.net
To use Authorize.net with the WordPress Shopping Cart plugin, you’ll need an Authorize.net account.
For testing purposes, you can open a free, Authorize.net test/sandbox account to try it out before you make your shop live. You can apply here.
![]()
Configure the WordPress Shopping Cart plugin
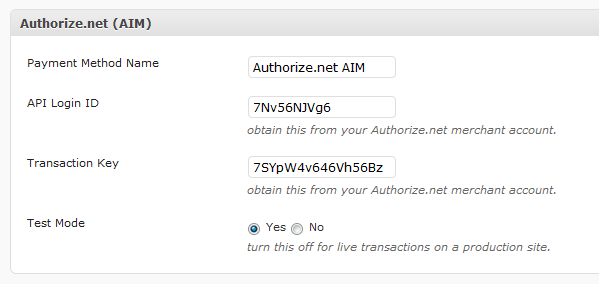
Once your account has been activated, you can login and go to Account > Settings and under ‘Security Settings’ you’ll click on API login ID and Transaction Key where you’ll find your Login ID and Transaction Key to fill into the plugin configuration settings under Checkout > Configuration > Authorize.net (AIM).
Results of WordPress with Authorize.net (AIM)
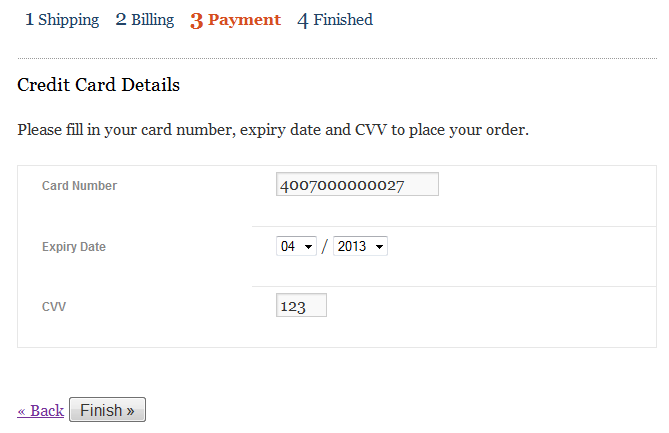
With that done, you are ready to start adding products and proceed with checkout. When you get to the page where you are asked for a credit card number, expiry date and CVV, you can use the credit card number 4007000000027, any date in the future for the expiry, and any 3 numbers for the CVV.
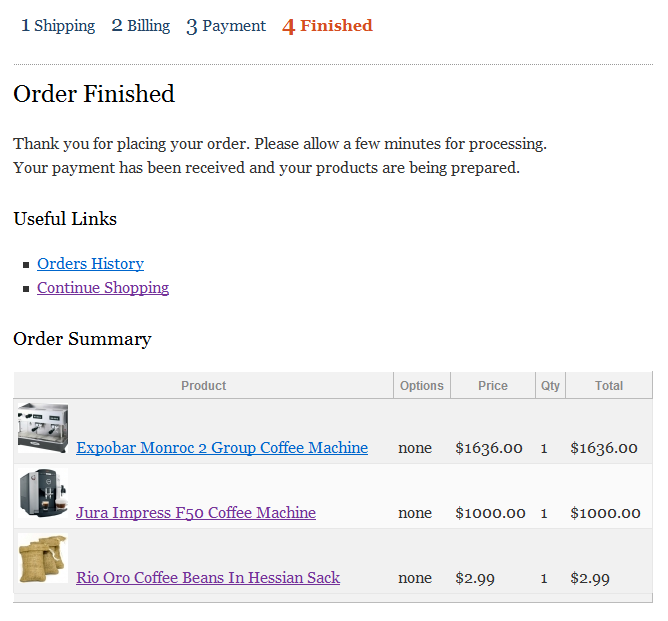
That’s it, your shopping cart can now process Authorize.net payments and complete orders successfully.
Video of WordPress with Authorize.net (AIM)
Troubleshooting WordPress with Authorize.net (AIM)
Phone is required
If you are getting declined/failed orders with Authorize.net (AIM) and the plugin reports that a field is required like "Phone is required" for example.
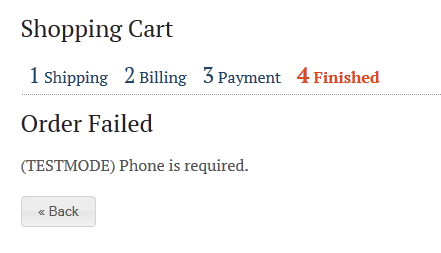
It means that this field is configured as required in your Authorize.net account and it can be turned off. To solve this problem, log in to your Authorize.net account and go to Account > Payment Form > Form Fields where you can untick the "Required" checkboxes accordingly.
Website & Email Hosting
Get the best website & email hosting for speed, security, and peace of mind. No restrictions. Freedom to do what you need in order to run your business.