Authorize.net CIM Extension Plugin
WordPress Shopping Cart plugin: Authorize.net CIM Extension plugin
Installation
1. Make sure that you have the WordPress Shopping Cart plugin installed.
2. Download the Authorize.net CIM Extension plugin from the downloads management section in a ZIP archive (you may need to login to your Tribulant Software account in order to access your download).
3. Extract the ZIP archive named checkout-authorizecim.zip in order to be presented with a single folder named checkout-authorizecim.
4. Upload the checkout-authorizecim folder to the wp-content/plugins/ directory of your WordPress installation, as seen in the example image below.

Activation
Once you have installed the Authorize.net CIM Extension plugin via FTP you need to activate it by visiting the normal Plugins > Installed Plugins section in your admin sidebar. There you will see the extension as a plugin listed amongst all the other plugins as in this screenshot:
Once you activate the plugin the Authorize.net CIM Extension will be available to be activated in the “Checkout > Extensions” section, the status shown as “Installed but Inactive” to the right of the description. Hovering your mouse cursor will cause a red “Activate” link to appear. Once activated, the red status message on the right becomes green text indicating an “Installed and Activated” status.
Configuration
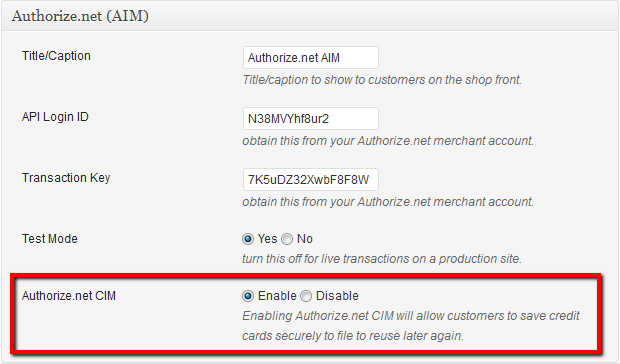
The Authorize.net CIM Extension plugin causes the addition of a new option in the Authorize.net (AIM) payment method under “Checkout > Configuration > Payment Methods” allowing customers to save their credit cards securely to file in order to reuse later again:

All that is needed is to simply Enable or Disable Authorize.net CIM in the Authorize.net AIM payment method configuration settings under “Checkout > Configuration > Payment Methods“.
Beautiful Newsletter Templates
Professional newsletter templates that are fully responsive for desktop, tablet, and mobile. They are 100% cross-client compatible.


